Styling and Photography of Jewellery
Published date: 30 July 2020
Whether you’ve just started out with your jewellery business or you’re long-established and simply looking for new ways to get your brand noticed, the right photography and styling can go a long way in capturing your audience’s attention.
Marketing your business is almost another job in itself and it can be hard to know where to start. Finding your ideal base, developing email campaigns, nurturing your online presence, creating unique and useful content… The task list can feel endless and maybe even daunting to a new business looking to make an impact.
But imagery plays such a vital role in getting your jewellery in front of the right people – get this right and it’s half the battle. Detailed photographs of your stunning jewellery pieces should clinch you that sale. Here, we look at some simple tips and tricks to bear in mind when photographing and styling your pieces.
Harnessing a crucial marketing tool
The photography on your website or brochure (or any marketing material) not only serves the purpose of showcasing your jewellery – it also demonstrates more of your brand personality and gives out a clear message about everything you stand for. It’s essential that your photography works hard for brand perception and to ultimately clinch you those sales.
As jewellery makers, we’re not photographers. It can be tricky to get the right angle or lighting, but it is possible to snap great shots of products yourself – you don’t need to hire a photographer. It all comes down to the attention to detail. The more amazing your pieces look, the better your chance of a sale. Our products are non-branded, so you can distribute under your own brand - check out wholesale jewellery collection for the amazing selection. It’s always a good idea to take a look at what your competitors are doing – build an idea of what works and what doesn’t and then apply it to your own photography. Our 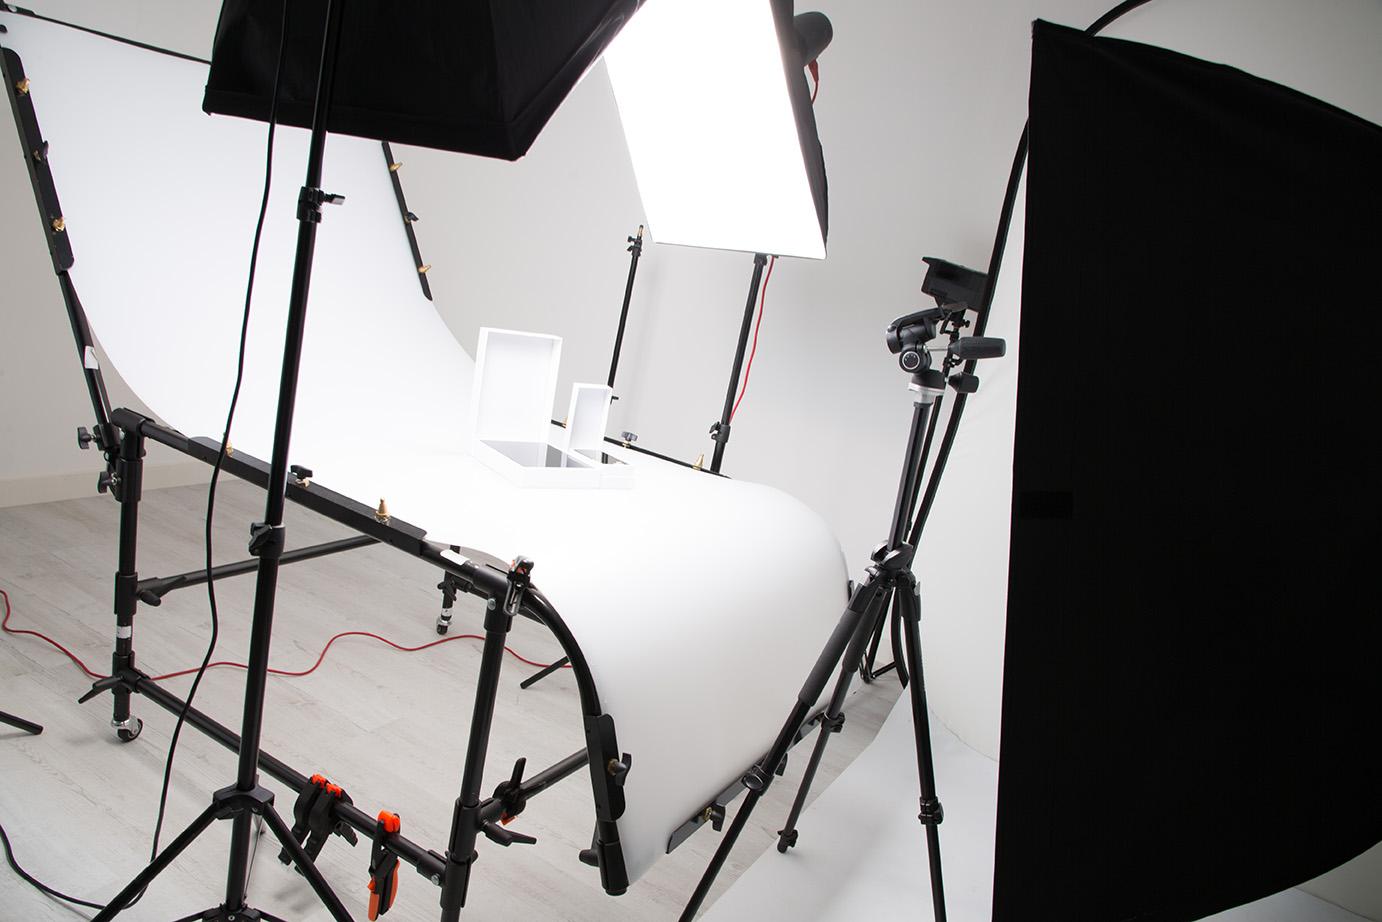
Getting the light just right
You could be using your phone or the latest advanced professional camera but if the lighting isn’t right, your photograph won’t be either. Lighting is extremely important to capture all the finer details of your pieces and really show off how much work has gone into them. Quite often light indoors can result in dull-looking imagery, while outside in natural light, you may find it’s too bright. It’s about getting a nice balance of both – shoot outside but under shade, for example, or indoors with a decent amount of sunlight coming in. You can always diffuse the light coming through the window with a white sheet of piece of paper. Wherever you choose to photograph, try to avoid artificial light as best you can.
Alternatively, invest in a photo light box, which offers the ideal lighting and eliminates shadows and dark areas. 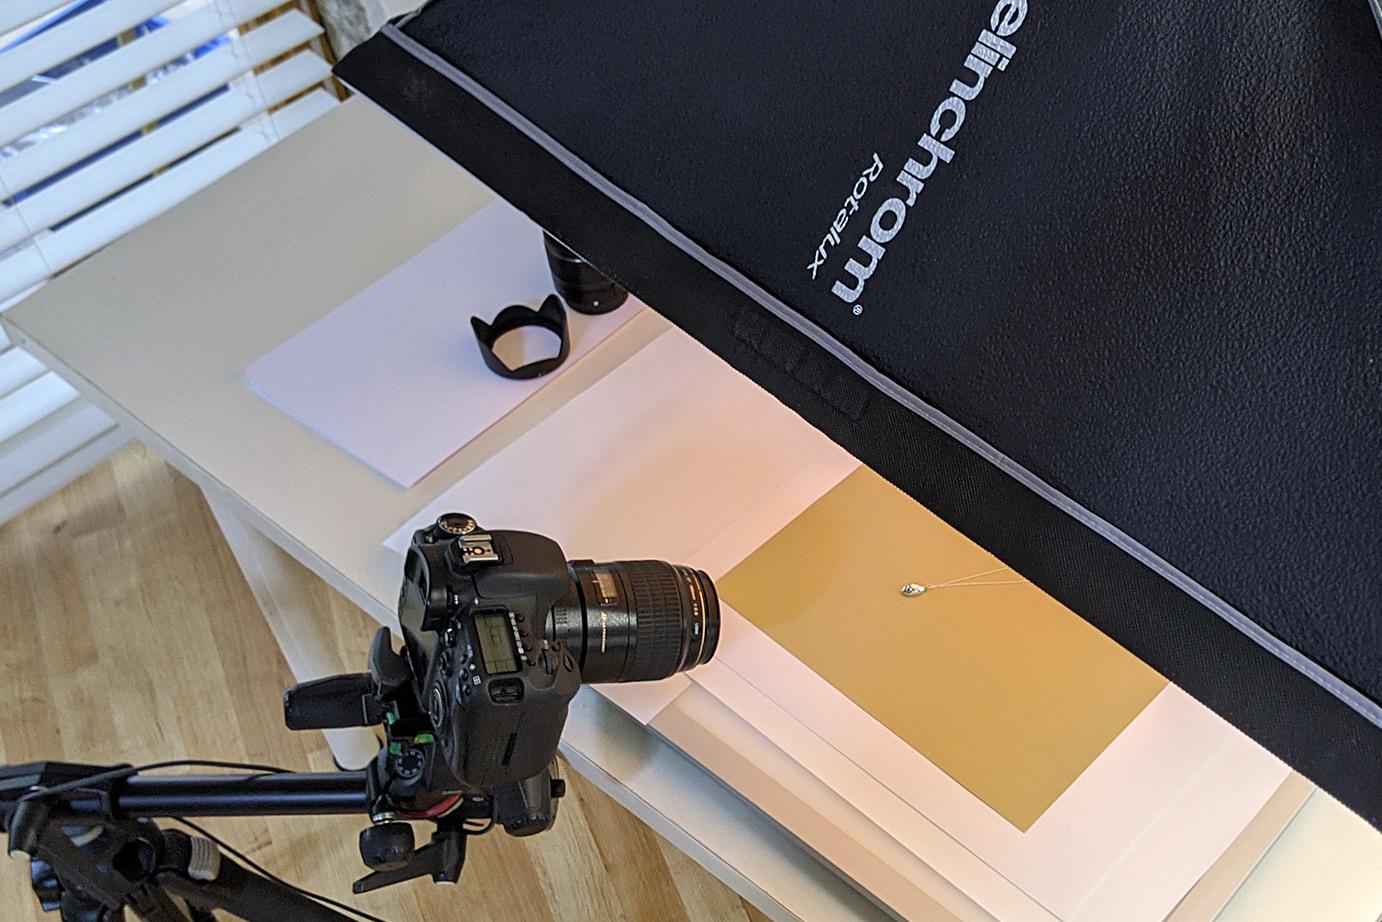
Using the flash
When it comes to the flash on your camera, jewellery is one of the trickiest items to photograph. Avoid using the flash altogether if you can, as it’ll usually only result in your product being covered in white light spots and harsh shadows in the background. One way to get around the glare from the flash falling on the product is to make sure you’re not pointing it directly at the jewellery.
It's all in the styling
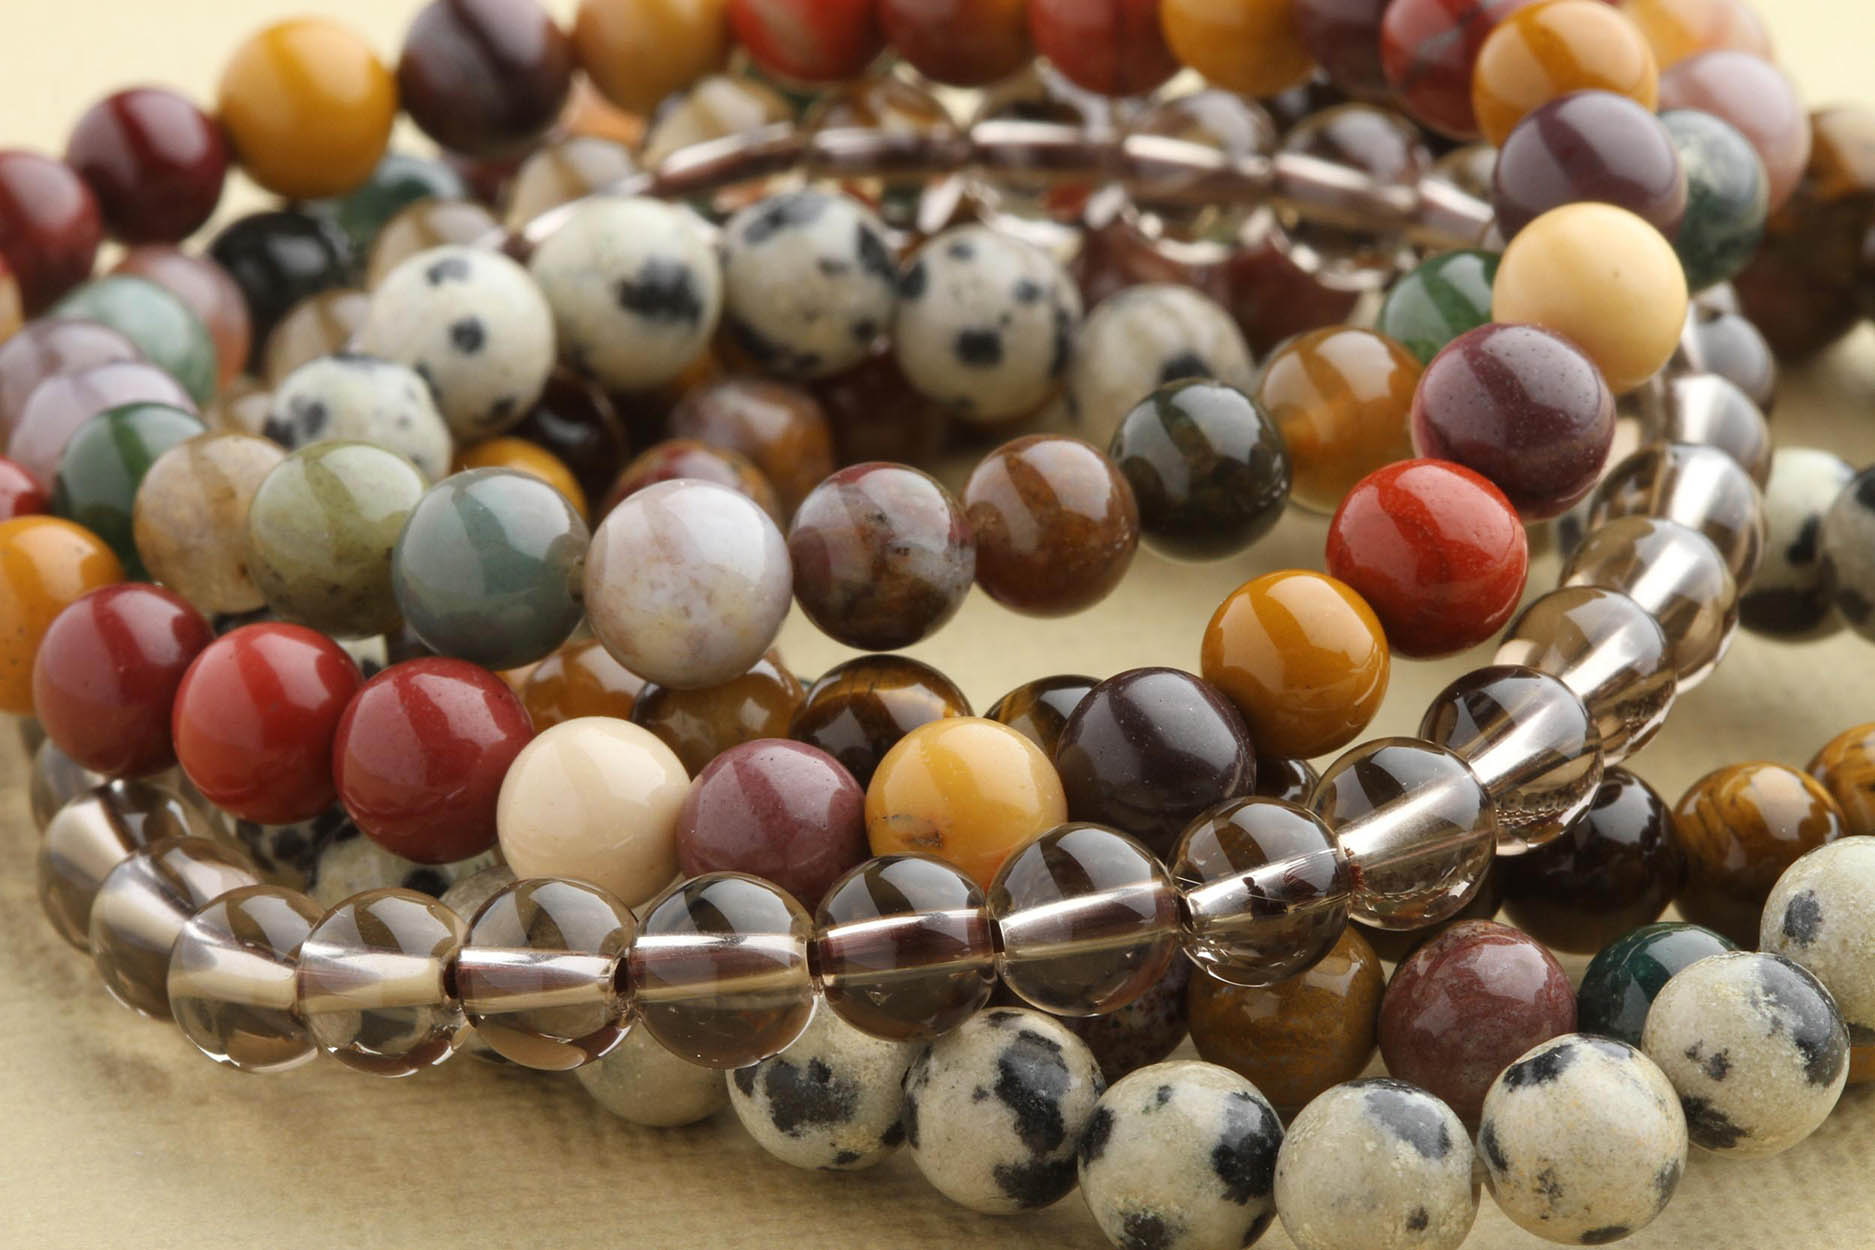
Make sure you’re thoroughly prepared before your shooting session – and that your items and cleaned and polished and looking in the best possible condition. The whole point of photographing your wares is to ensure as realistic depiction as possible in terms of colour and size. For this reason, think very carefully about the background of your image. Your audience are likely regular users of Instagram and Pinterest, hinting at the value they place on imagery – you’ve got one chance to get their attention. Make sure the background of your photograph is as natural as it can be. This allows the colours of your products to pop. As with other elements of marketing, consistency is key here. Choose a background and image size that you can realistically use throughout your online store or brochures. This way, product browsing is an on-brand, user-friendly, easy-on-the-eye experience.
With styling, keep it simple – it’s the best way to really show off the product and all its unique details. The simpler the photography, the easier it is for anyone browsing to view and visualise the jewellery on themselves.
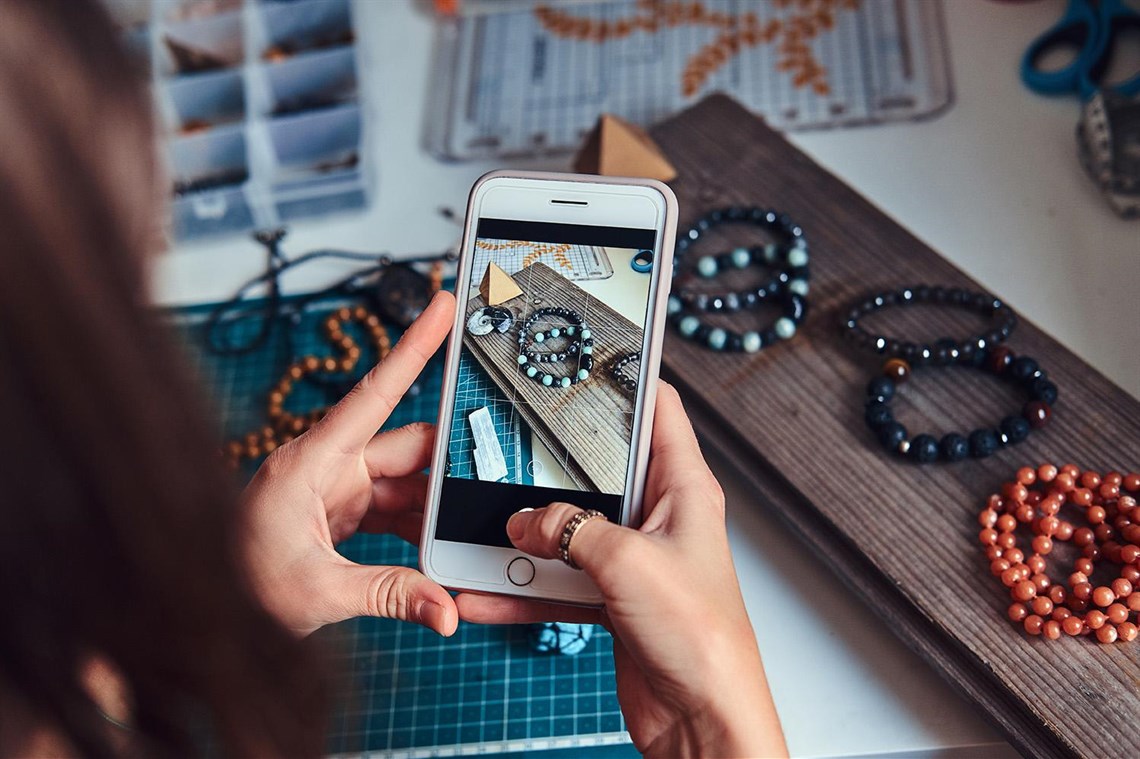
Use props – like a mannequin bust for necklaces – to showcase your products and help consumers view them in a realistic shape. There are various tips and tricks if you don’t have a mannequin bust, though. A piece of cardboard covered with white paper and your bracelet or necklace taped down is a simple but very effective idea. For rings, use glue dots or double-sided tape to stand the rings up, enabling you to show its features in detail. Do take care when using props, however, as some can detract attention immediately from the product.